IBM X3550 M4 2.5 Inch Hot Swap SAS Backplane FRU: 94Y7587
- Manufacturer: IBM
- Part Number: 94Y7587
- Specs:-
- 46C9091 - Backplane SAS 2.5-inch Hot-Swap hard drive with Bracket
- Condition: Refurbished
- Warranty: 1 (one) year Tekmart warranty
-
Key points to note on these 94Y7587 IBM Backplanes:-
Lenovo System x3550 M4
The Lenovo System x3550 M4 Type 7914 server is a 1U-high rack model, two-socket server for high-volume network transaction processing. This high-performance, multi-core server is ideally suited for networking environments that require superior microprocessor performance, input/output (I/O) flexibility, and high manageability.
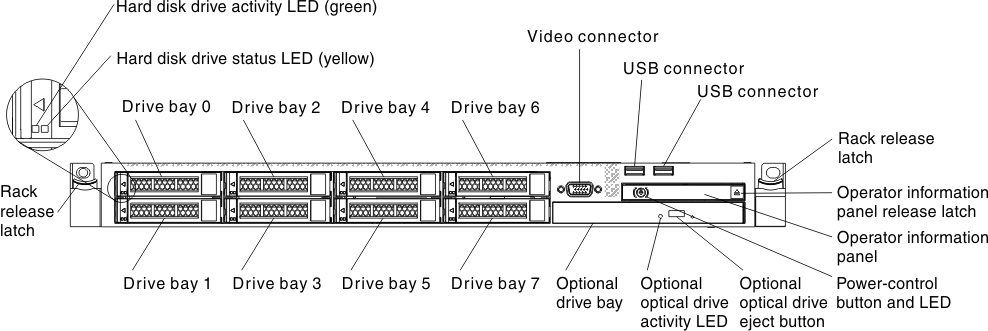
Figure 1. Front view: 2.5-inch model
Replacing the hot-swap drive backplane
Use these instructions to replace the hot-swap drive backplane.
To install the replacement hot-swap hard disk drive backplane, complete the following steps:
- Reconnect the cables to the hard disk drive backplane.
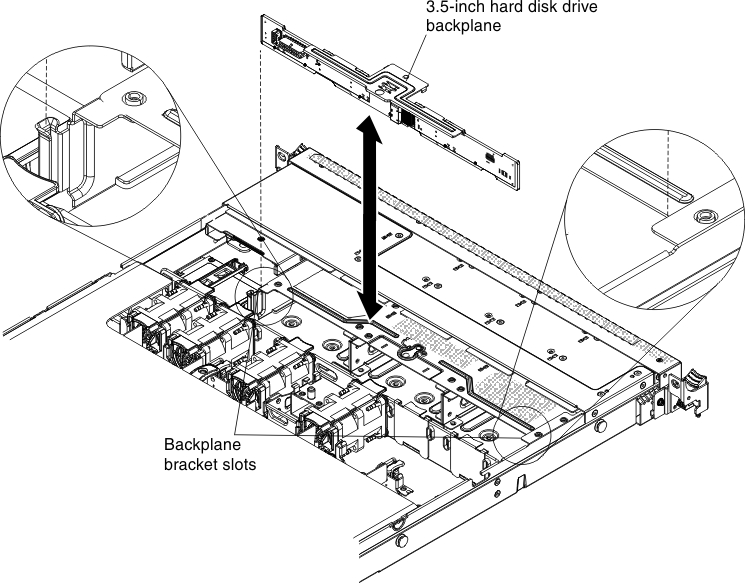
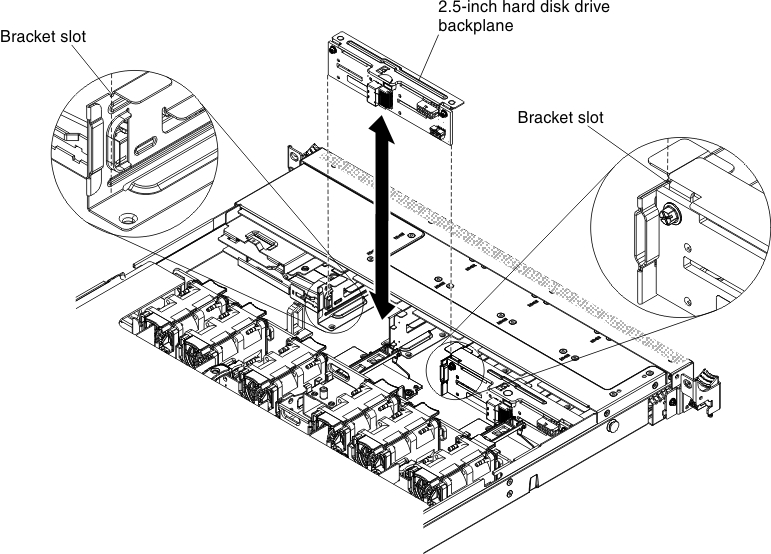
- Align the sides of the drive backplane with the slots on the backplane bracket.
- Install the hard disk drive backplane.
Note: You can reconnect the cables to the hard disk drive backplane before installing the backplane onto the brackets or you can connect the cables after you install the backplane, if that is easier for you.
If you would like to install the 3.5-inch drive backplane.
If you would like to install the 2.5-inch drive backplane.
- Insert the hard disk drive backplane into the slots on the backplane bracket and push the hard disk drive backplane down until the backplane is fully seated.
Figure 1. Backplane installation
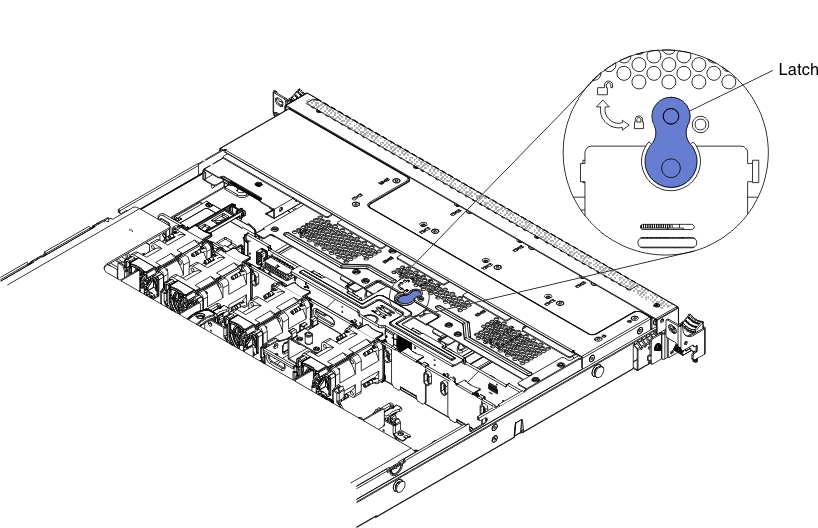
- Adjust the latch to the locked position.
Figure 2. Latch adjustment
- Insert the hard disk drive backplane into the slots on the backplane bracket and push the hard disk drive backplane down until the backplane is fully seated.
Figure 3. Backplane installation
- Connect the signal, power and configuration cables to the system board. Route the signal cable from the drive backplane along the chassis and connect it to the SAS/SATA controller connectors. Then, route the power cable and the configuration cable from the drive backplane along the chassis and connect it to the SAS/SATA power connector and SAS/SATA configuration connector.
- Reinstall the hard disk drives.
- Install the cover.
- Slide the server into the rack.
- Reconnect the power cords and any cables that you removed.
- Turn on the peripheral devices and the server.


 English